SNACK Defense Beginner Guide: First Session, First Wins, and What Comes Next
The SNACK Defense beginner loop explained: claim starter gems, summon and equip your first snacks, place and upgrade them in-match, and pick early goals that pay.
SNACK Defense is a Roblox tower defense game where you place snack-themed units ("snacks") around a kitchen-style map to stop waves of evil gummy bears. The loop is short and repeatable — win matches, earn gems and XP, summon stronger snacks, then step up to harder maps — and a new account can go from launching the game to a paid victory in one sitting:
- Claim your starter gems and summon. New accounts receive 100 gems on the summon screen; spend them on your first pull.
- Equip your two strongest snacks in the inventory. Only two units enter a match at first.
- Queue Candy Defense, the Easy starting map, with 2x speed and auto-skip turned on.
- Place snacks on the highlighted "optimal place" circles, start the wave, and keep upgrading as match cash allows.
- Beat the boss — typically King Bear and Queen Bear. The victory screen pays gems, luck, and XP.
Each of those steps has details that trip up new players, so here is the full route.
Your first session
Claim 100 starter gems and roll your first unit
Your first 100 gems are waiting on the summon screen. Use them immediately: open the Summon menu and roll. Any rarity works for round one — the first pull usually lands a common or epic like Melon, which is enough to clear the opening rounds. Do not reroll for a perfect start; the early difficulty curve is gentle.
Rarity matters more later. Commons are fine for rounds 1–10, Epics are solid filler, Legendaries carry waves with their range and attack speed, and Mythics are rare chase units most players only see in the Index. For every current way to add snacks to your account, see how to get snacks.
Once the starter gems are gone, players split on the best early purchase. One approach keeps buying standard summons — 100 gems each, topping out at Legendary — because core units like Cookie and Milk come from that banner. Another recommends saving for banners that guarantee Epic or better, since standard rolls can duplicate units you already own. Either way, a new pull beats a repeat: a duplicate of a Legendary you own cannot be equipped.
Equip two snacks before you hit Play
Your loadout holds two units at the start, so open the inventory and equip your two strongest snacks before hitting Play. A third slot arrives early — one new player was told level 5 unlocks it, and another found they could hold a third unit right after a close win — but plan your first matches around two.
Pick a map and fix your settings
Start on Candy Defense (Easy), the map built for learning the basics. From there the named maps step up: Enchanted Forest (Medium, tougher waves), Dumpling Defense (Hard, wants buff stacking), and Bee's Diner (Expert, endgame squad). The full breakdown lives on the maps page. Endless mode — the indefinite wave grind behind the leaderboard — unlocks at level 50, so your first sessions happen on standard maps.
Before you queue, open settings and turn on 2x speed and auto vote-skip. The speed control sits in the top-right corner of the screen; 1x and 2x are free, while 3x is a Robux game pass (reported at 399 or 320 Robux in different videos, so check the live price in-game). Turning off camera shake keeps long sessions comfortable.
Placing and upgrading snacks in a match
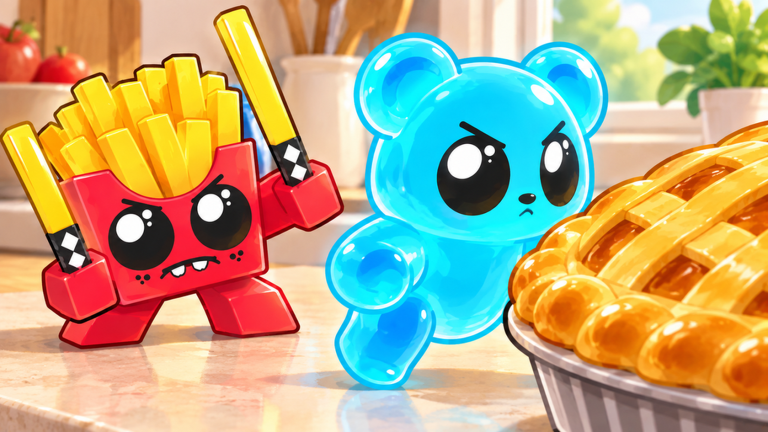
When the match opens, the game prompts "Don't forget to place your snacks. Tap one below." Buy a snack and drop it on one of the highlighted optimal place circles, then press start on the next wave. Watch for the second reminder — "Don't forget to upgrade your snacks" — because upgrades are where your match cash should go. Each snack climbs through several upgrade levels (the panel counts them, like "2 out of 6") and reads Max when it is done.
Two caps shape every layout. The map allows a maximum of 20 placed units in total, and each snack type has its own placement cap on top of that. When you hit either limit, upgrade what is already down instead of stacking more of the same, and keep mixed coverage for splitters, flying waves, and bosses.
Your first snacks divide the work, so give each a job:
| Snack | Role in an early match | Where and how to use it |
|---|---|---|
| Melon | Starter all-rounder and your main anti-air; its boomerang arc gains pierce from upgrades | Keep it equipped in every early loadout |
| Grape Juice | Cheap, fast single-target damage; attack speed rises with upgrades | Place several up to its cap as your opening DPS |
| Hot Sauce | Long-range AoE splash carry that also hits air; slow base attack speed | Save up, then place it centrally to cover multiple path lanes and upgrade it |
| Honey Bear | AoE control that slows enemies | Put it at chokepoints and path bends |
Hot Sauce is too expensive to place on opening cash, so the working pattern is: open with cheap Grape Juice, let kills build your in-match cash, then drop Hot Sauce in the middle. Placed snacks also earn their own XP during the run, unlocking perks like Melon's pierce and Hot Sauce's splash.
If you get support units, place them deliberately. Milk (Epic) gives every snack in its circle 50% more damage and Coffee (Rare) gives up to 40% more attack speed; inside both circles the buffs multiply to 2.1x damage. Only the strongest buff of each type counts, so one Milk and one Coffee per group is plenty — everything else should be damage dealers.
How a round progresses
Early maps run about ten waves, and a full match usually takes one to five minutes — fast for a tower defense game. Threat climbs in steps:
- Waves 1–10 (low): two or three placed units and 2x speed are enough.
- Waves 11–20 (medium): add coverage units and start upgrading in earnest.
- Waves 21–30 (high): keep backup units near your base and max your key upgrades — around wave 25–30 enemies start pushing deep, so your backline needs protection.
- Wave 30+ in Endless (very high): focus your fire lanes and defend the base.
Mini-bosses appear midway through a map and can remove your slowing effects, so do not rely on a single Honey Bear forever. Every standard map ends with a boss — typically King Bear and Queen Bear — and the first final boss triggers a cutscene that brings an assisting ally, which makes first clears more forgiving. Winning opens a victory screen showing kills, waves, damage, units, and time, and it pays gems, luck, and XP automatically.
If a run looks lost around wave 30, upgraded backline units can still clutch the wave. Do not quit early; many near-loss runs turn into clears.
Early mistakes that cost new players
These warnings all come with a concrete in-game cost, which is why they are worth internalizing before you build bad habits:
- Hitting Play without checking your loadout. Equip your two strongest snacks every time; you only get two slots early.
- Counting on a duplicate Legendary. A duplicate of one you already own cannot be equipped, which is exactly why new pulls are worth more than repeats.
- Stacking one snack type. Between the 20-unit map cap and per-type caps, extra copies of the same snack hit a wall fast — upgrade instead, and mix coverage for splitters, flying waves, and bosses.
- Placing a second Milk or Coffee. Same-type buffs do not stack, so the duplicate only wastes a slot a damage dealer could fill.
- Benching a working unit because a rarer one arrived from the Gumball Machine. Rarity is not a tier — an upgraded, well-placed common can outperform an uninvested rare. Judge each pull by the role it plays.
- Discarding new units. The Index rewards ownership, not team power, so even a bench snack moves you toward milestones.
- Taking Melon off your loadout. Flying waves punish grounded-only teams; one player who swapped Melon out was caught mid-round asking "Do we have flying? Oh no, I took melon off" as the wave leaked.
- Quitting runs that look lost. Upgraded backline units regularly save near-loss waves.
- Farming a favorite level before clearing the rest. Every map has six levels, and the first win on each pays 4x the normal gems — clear them all once before you grind favorites.
- Rerolling for a perfect start. The early curve is gentle; your first pulls are meant to be good enough.
What to do after your first wins
The sessions after your first clear are about widening your income and collection:
- Daily tasks, shown on the right side of the screen each session. Recorded payouts include 100 gems for defeating 50 enemies and 150 gems for winning three matches — read the live values in-game, since task rewards change with updates. Weekly tasks reset with larger gem payouts.
- First clears first. The 4x gem bonus on every level's first win is the cheapest income a new player can get.
- The Index. Open it after collecting new units and claim milestones — they are easy to overlook. The details are on the Index rewards page.
- Inventory upgrades. Leveling your units in the inventory between matches is one of the highest-value uses of resources in the game.
- Leveling toward Endless. Early levels come quickly from wave clears and gem income, so play matches rather than grinding levels for their own sake. Level 50 unlocks Endless mode, whose records feed the leaderboards.
A realistic early checklist: clear Candy Defense Level 1 (which also unlocks Grape Juice), join the official group and claim its free rewards, place and max one Hot Sauce in a match, summon your first Epic or better — Honey Bear is a common target — earn your first Legendary, then chase wave 30 in Endless once you reach level 50.
Where you go from here depends on what you need next:
- To understand each unit before investing upgrades, start with the SNACK Defense units page, then see how the community ranks them in the tier list.
- To field a stronger team, follow the best loadout guide.
- To fund more summons, the how to get gems fast guide covers income beyond match wins.
- To plan the road to level 50 and past it, use the leveling guide.
- To know what each wave throws at you, check the enemies page.
And when you want a quick top-up check between sessions, the dedicated codes page keeps track of the current promo codes for you.
Related Guides
Tier List
The campaign-tested S-tier picks, a full-roster meta ranking, starter values, and the ranking criteria behind every placement.
How to Get Gems Fast
All verified Gem sources with requirements, plus an efficiency comparison of Endless runs, the daily baseline, first-win bonuses, and budget grinding.
All Maps
All five current battlefields with difficulties, unlock order, and the run rules that change on each map.
Leveling Guide
Which activities raise your level, the XP bonuses worth stacking, and a map-order route from first wins to the Endless gate.